Showing posts with label inspiration. Show all posts

Thursday, May 14, 2009

Silk Garden Cloth

All this cloth I have collected this year... these were made to test colour relationships, resists etc. They sit, piling up and they languish on top of my dryer.

I feel the need to put them to use, perhaps cut them up and have them work together somehow. This green one below involved several processes to achieve the texture and layers of colour. Maybe I won't cut it up so much.


This is a multi-colour silk screen process. I have tons of this stuff, so I will cut away with little fear.


Here is more of the green. I really love this piece. It reminds me of a Canadian garden at this time of the year - full of promise.


Ah, my dot cloth. This swatch makes me want to go back to the silk screen and dye pots to make more of this in different colour combos.


See you all later...

Friday, May 08, 2009

The Art of Gardening


At this time of the year, I like to escape the studio to spend time in my garden.

I love the smell of the warm earth after a long cold winter. As if reading my mind, my friend Gerry Glavin sent me this funny story.

An old man lived alone in nearby Kingston County. He wanted to plant his annual tomato garden, but it was very difficult work, as the ground was hard.

His only son, Vincent, who used to help him, was in prison. So he wrote a letter to his son and described his predicament:

Dear Vincent,
I am feeling pretty sad, because it looks like I won't be able to plant my tomato garden this year. I'm just getting too old to be digging up a garden plot. I know if you were here my troubles would be over. I know you would be happy to dig the plot for me, like in the old days. Love, Dad

A few days later he received a letter from his son.

Dear Dad,
Don't dig up that garden. That's where the bodies are buried.

Love, Vinnie


At 4 a.m. the next morning, the RCMP and local police arrived and dug up the entire area without finding any bodies. They apologized to the old man and left.

That same day the old man received another letter from his son.

Dear Dad,
Go ahead and plant the tomatoes now.
That's the best I could do under the circumstances.

Love you,
Vinnie

Sunday, May 03, 2009

Did You Know?

I came across this video on Gloria Hansens blog.

I too do not know how accurate the data is (there are some credits at the end) but needless to say I am now very alert. Watching this video is like drinking a strong cup of coffee. In fact, you may just want to grab a cuppa while watching. It's about 4 minutes long.

I found it inspiring and energizing. What do you think? Too much info?

Tuesday, April 28, 2009

Visual Sketchbooks - cont'd

OK now for Part 2,


But first - one more thing about the books. When assembling these, I like to use hard covers (usually heavy card stock or mat board) and I fuse hand dyed cloth to the front and back covers.

What you see in the next picture is a sketchbook open to the back page, showing the inside of the back cover.


This next picture is a page in the mid section of the same book showing the initial ink wash.

Next, I open the newly bound sketchbook either to the first page or last… not important which. Then, using a #11blade knife I cut out a shape (or two) from the page. Sometimes I use the imagery suggested by the black ink or I may have another specific shape in mind. I continue cutting out these shapes on several pages, focusing mostly on positive and negative shapes.


Using various black pens (from microns to fat markers) I add lines, textures and shapes at will to each page, going back and forth across the book. This process allows me to really develop a specific concept in much greater detail than ever before.


I end up with roughly four dozen drawings that are related in imagery, line, shape and texture. Sometimes I will fill up a book in one sitting but more often I will come back to the book several times to work a few sketches at a time. This is a very meditative process and provides rich thumbnails for future work.

Because of the way a book is structured, each cut out shape affects both sides of a page. As I turn to the next page, my cut out is still there but in a new context. This feeds the next cutout, inking and dare I say it even an occasional colour mark...

To keep things exiting, I have on occasion inserted a page or two of translucent organza or other textile into one of the signatures to allow for an occasional stitch mark to contrast with the paper drawings.


There are no end to the possibilities with this approach. Books can be made entirely of cloth and paper can be initially painted with coloured inks. I have been so busy just exploring the possibilities with black ink I haven’t yet been able to get around to colour – but it won’t be long!

Sunday, April 26, 2009

My Take On Visual Sketchbooks

Lately I have been following with interest Pam RuBert’s posts about keeping visual sketchbooks organized. She collected a great list from her readers on how they tackle this – check it out HERE.


I'm no different...I too struggle with organizing and collating my sketches for easy reference. Recently I found a solution that has worked for me. I now sketch, draw, stencil and mark as I make the sketchbook….Weird huh? But this works.

Each one of my books contains several drawings related to one theme. They are all bound together into one book that is dated and signed. I got this idea from Dorothy Caldwell, whose work I love.


Here's how it works:
I start by slathering (yes, almost sloshing) black India ink on a large sheet of really nice white paper and let it dry. I work pretty fast using a foam brush, or sometimes I even pour the ink directly on the paper, let it settle a bit, tilt the paper etc.

My aim is to produce a rich contrast between the black of the ink with the creamy white of the paper. Acid free card stock quality paper or similar is very satisfying…


Then I cut the large sheet of inked paper into several 4’’ x 8½’’ stacks.

I fold these in two and arrange them into signatures ready for sewing into a sketchbook.
There are several online tutorials on how to sew these little books together.
Pam has a link to THIS ONE on her site. My favourite is a Coptic stitch bookbinding technique I found HERE. It is fast and fun to do.


Normally this would be the end of a sketchbook making exercise, but for me this is only the beginning. In my next post I will describe how the bookbinding and sketching come together and feed off each other!

Thursday, December 11, 2008

Hello blog...


Oh my, it has been a long time.

The time has come to get back in the saddle and post again.
This past year I decided to undertake the Artcloth Mastery program offered by Jane Dunnewold in San Antonio, Texas. The program is wonderful, demanding (I have several assignments that are due). I have been learning a lot from a great teacher and my fellow art cloth companions.

Here is a shot of the Art Cloth Studio in San Antonio. It occupies the entire third floor of an old mission church and is therefore huge.

Here Jane is setting up a class meeting

Discharged silk fresh out of the dryer with someone's respirator.

Black rayon discharged with 1) chlorine - coppery area 2) RIT colour remover (sodium hypochlorite) white cloudy area and 3) discharge paste (Rongalit) - grey stamped area at top. All three agents affect the cloth in very different and interesting ways. More to come later.

Monday, July 07, 2008

Back from teaching at Haliburton!

Here are some picks from this very productive week with very productive students at the last week 30 June to 4 July.
I was very impressed with what was accomplished by this first Quilting By Design group.
Haliburton School of the Arts
They handled a lot of challenges with interest, curiosity and good humour. Monday at noon, black & white designs show up on the wall.
Monday afternoon they worked their designs into more complex compositions.


Some turned their design into repeat blocks.

Tuesday was all about colour.
Below is a thumbnail sketch for a composition.

Tuesday afternoon they painted fabric as needed.


and that included marking fabric with coloured sticks.

Then, once coloured fabric was on the table there was no stopping the design action...


Smiles appeared. All this surface design aside, I believe that fabric artists are happiest when we are at the machine sewing! By Thursday sewing machines were whirring, some with the dogs down and some up.


Here is a shot of our room during the Thursday afternoon studio visits.

Above is a finished composition on the wall - binding on and signed by the artist.
It is seen here with it's original black and white studies.


Here is another finished quilt seen with original black & white sketches.

By Friday everyone in the group had an original quilt finished, some had two quilts and sketched ideas for more.

What a week... and what a terrific group!

Monday, June 09, 2008

What to do with dreaded Angelina??

Some love this stuff, others hate it.

I know some even refuse to have it their studio. I have been among this crowd...as I am usually suspicious of sparkly stuff. So why am I wasting my time fiddling with this stuff? My friend Jennifer, who owns a quilt shop, tells me that up here in the Thousand Islands region, Angelina is hot- hot - hot. Many of her customers buy the stuff, want to use it but some run into difficulty trying to integrate it into their quilts. Others overuse it. She has asked me to try it out and ''...come up with something.''

Given that I am interested in exploring what this seduction with Angelina is all about and that I love a challenge, I have decided to take another look at a product that I have previously dismissed. So, I spent this past weekend fiddling with all kinds of Angelina, the shredded stuff the we all know and the newer film.

This is a pick of the shredded candy wrapping- paper like stuff that self-sticks when heated. And next shot is the newer film - same as the shredded angelina but not shredded. Hmm.


This was my first try. A real piece of Angelina GROT.


I think that as a base rule, ''when coming up with something...'' it is important that at a minimum, the effort MUST yield something that looks better than the original product!

Here is another example of Angelina GROT - Yuck!
From a process perspective, I can understand why this stuff tends to be overused as it is fast and easy to work with. It it sticks to itself yet is not sticky, it doesn't ravel and there are no fumes - but other than decorative applications I am having a difficult time finding a serious application.
More yuck - with this piece I entrapped yarn between two layers of the shredded stuff - e-gads!

It was time STOP and check out the garden.
I needed a little nature study to remind myself to stop what I was doing.

I discovered part of my problem... there was no way that Angelina with all its reflective surfaces, could come any way near with what is out there
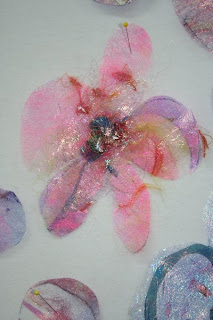
Back in the studio I went for a different focus. Instead I put Angelina to the task of helping me to express something more personal, more abstract. So, I ironed several 8 x 10 sheets of Angelina, trapping bits of film, wool, roving etc. then I drew directly on these sheets with a marker. Better.

Here is another one.

I liked the drawings so I cut them out and pinned them up on the wall.


This is where I'm at with this. So far so good and I am not done yet wrestling with this stuff. :-))